Once you've logged into your account at http://carcare.tv, you will see your Account Dashboard screen. From here, you can click Onboarding in the left side menu, or from the large block in the middle of your screen.

You'll now be taken through a multi-step wizard. Don't worry, every screen has an Exit Setup button at the bottom if you need to stop the process. You can go through Onboarding anytime to make a bunch of changes in one place, not just the first time you setup your program.
Here's a walkthrough of the steps you'll follow:
See how easy this is so far :-)
Edit/Enter your business information:
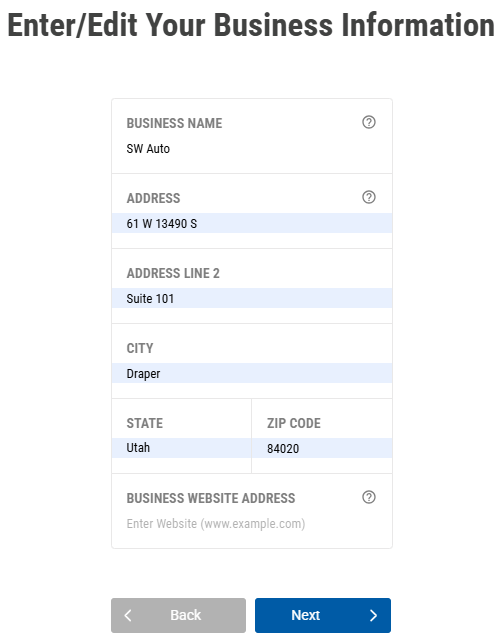
If you have a business logo, Upload it here by finding the file on your computer. If you don't have a logo, you can just use the name of your business to display on screen.

You can now enter your business colors to apply to the designs on your screen(s). You can either select or type in the color specifics, or you can click the eyedropper to get the right color directly from your uploaded logo file.

Now choose if you want your default template theme to be Dark or Light color. Don't worry, you can easily change this later, and also see how it looks with a preview of your program.

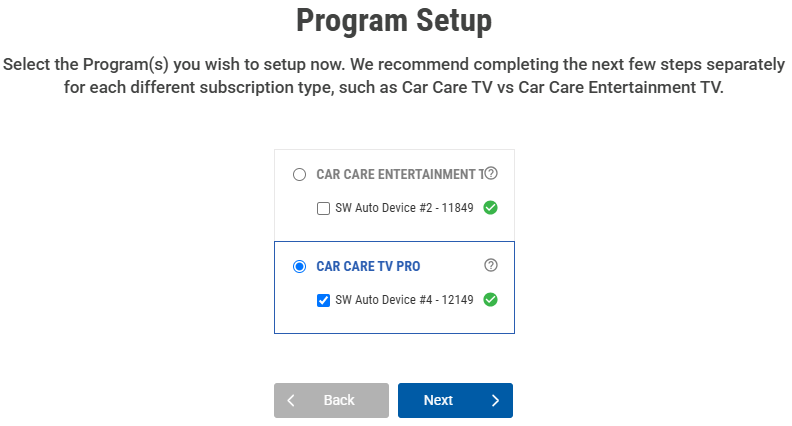
This next step is to choose which Subscription / Program you wish to setup for Onboarding. If you only have one subscription, then only one will appear. If you have more than one, pick whichever program you want to setup first. Then, once done, the system will prompt you to setup your next program(s).
For these next steps, we'll walk through setting up a Car Care TV Pro (CCTV+, or Digital Menu Board) program first. For the Care Care Entertainment (CCETV - waiting area / lobby TV) program, scroll down below).
This next screen is your Service Menu. This list is always available for you to view and edit from the main left side menu anywhere in our online system, with its full functionality. This list is your primary source for what services you offer, the name and grouping for that service, if you want that service to appear in your menu or image/video rotation, the price and disclaimer to appear, etc. There's a lot here, so we'll walk through each part. Note this Onboarding version is simplified from the full version from the main menu.

- The check box next to any service determines whether or not you offer that service at your business. If you do not, or do not want this service to display any specific videos or images in your program, then simply uncheck this first box.
- The Display In Menu option determines whether or not the text will show in your menu list of services. You can check the previous box for a service, like Water Pump, to play videos and images in rotation, but uncheck this box to not display Water Pump in the menu list of services on your screen.
- Disclaimer is for use with any pricing shown for a service. If you don't want a price for any service, then just keep the default to Don't Display. You can choose one of the pre-typed options for your disclaimer, or simply type your own, Enter Custom field at bottom, and then click the check mark to save your text.

- Price is a field for you to enter the amount you charge for this service, if you want to show this information. Just keep this blank if you don't want it to display.
- NOTE - in the main Service Menu, found on the left side menu throughout the site, has many more options for customization.
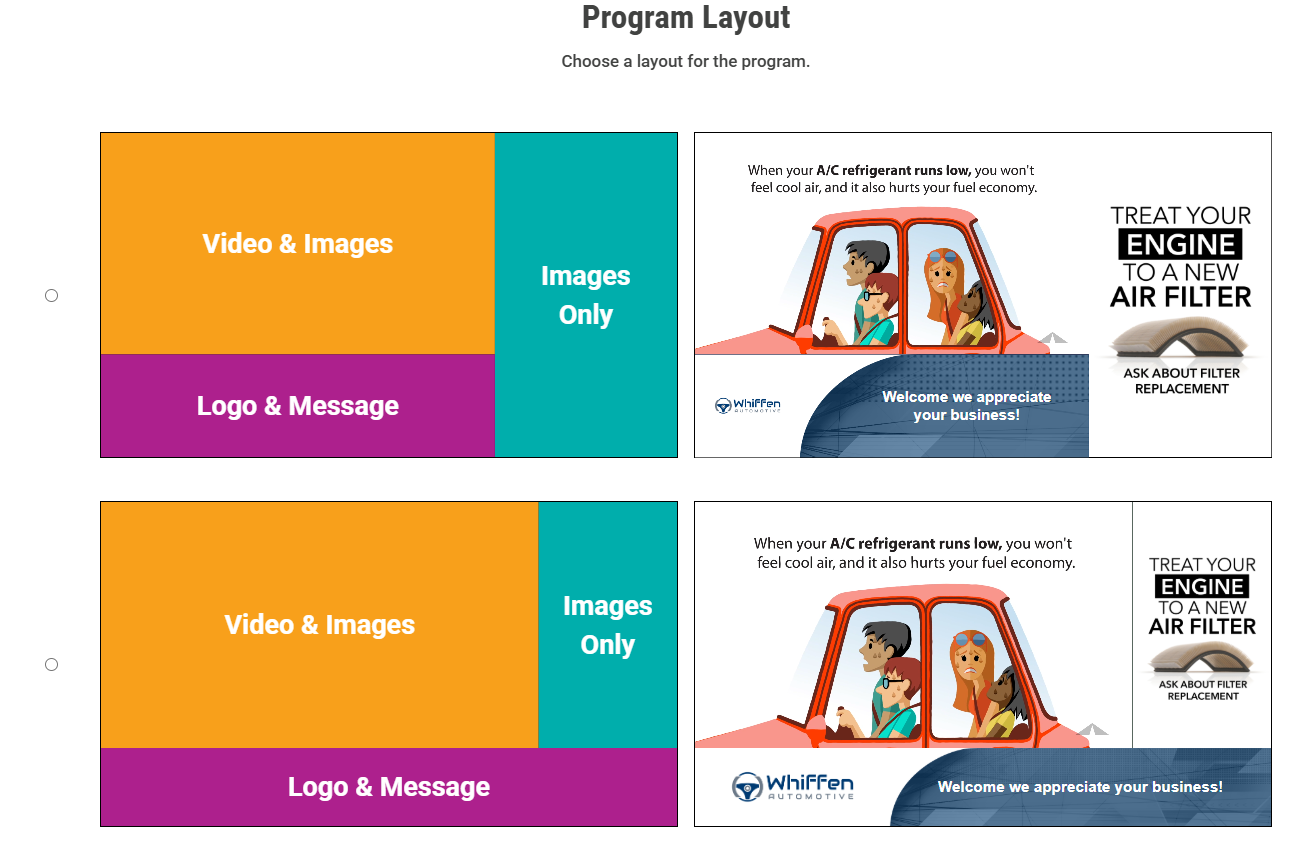
The Program Layout screen shows you all of the main layout configurations available for this program type (e.g. CCTV Pro vs CCETV {for your waiting area}). You can pick one and then go to the next screen to see more details. If you don't like your selection, simply choose Back to change it again.
Each layout shows the respective Zone types, shapes and sizes on the left, with an example on the right using your previously selected information. You'll have even more customization options in the next step. Click the Layout you like and press the Next button at the bottom.

You'll now see your selected Layout with more options at the right.

The top option, Layout Configuration, gives you several ways to customize your screen layout more. Click on each option to see how it moves the different zones to various places on the screen (top vs bottom, and left vs right).

The Logo / Message zone allows you to choose to use just the text of your business name or your previously uploaded. This is also where you can change the text of the on-screen Message.

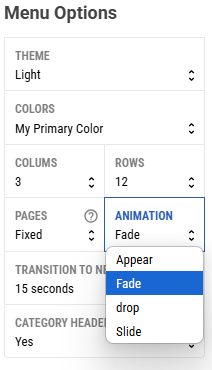
The Menu Options area gives more detailed control over the look and feel of your price list / menu display zone. No other zone on the screen is changed with these settings. Click each of the options to see how the appearance of your menu changes.
Note the Pages - Fixed vs Dynamic setting either locks in the number of services that show on each screen, or constantly updates this so the screen is always full (but this option also means services won't remain constantly in the same place on screen).
Here's a quick video that shows you how your selections and changes are reflected, with a live view, for your CCTV Pro program:
The final step, Build Your Program, enables you to choose to have your service selections Automatically Build your entire program with new videos and images to display (the default, and our recommended option), or for this device to ONLY show videos and images that you manually add to the program.

Once you're done, you'll be prompted for the options shown below. If you don't have any other subscription programs, you can click to View My Programs or to View Dashboard.
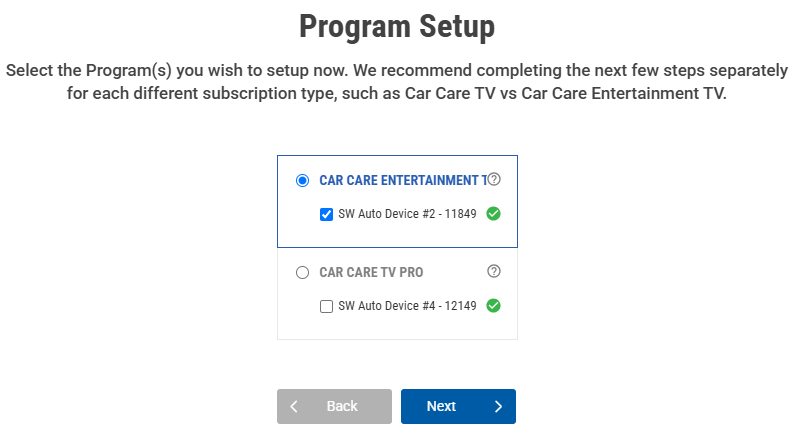
If you also have any subscription(s) for the Car Care Entertainment (CCETV - waiting area / lobby TV) program, please click the Setup Another Device(s) option. We'll now follow this option for the rest of this article.

We'll now choose to setup our Car Care Entertainment (CCETV - for waiting area / lobby TV) program.
The next screen allows you to make any changes to your Services. Since you just edited these for your Car Care TV program, simply click Next. But this screen allows you to easily change these settings anytime you go through the Onboarding.
Just like before, you'll see the Program Layout options that are available for the Car Care Entertainment TV program, which are slightly different than the Car Care TV program. You'll notice the difference between the top two options is the amount of space dedicated to each zone. The second option gives more screen real estate to the primary video zone, while the first option shown gives more space to the side zone of rotating images.
Once your layout is chosen, you'll be taken to more Display Options for greater customization. Like before, the Layout Configuration drop down list at the top will shift the different zones to various places on the screen (top vs bottom, and left vs right).

Here's a quick video that shows you how your selections and changes are reflected, with a live view, for your CCETV program:
The final option for the CCETV program is the Video Content Mix, which determines if your program includes Entertainment videos only (fun, family-friendly videos for all ages), Car Care Education videos only (e.g. Brake Service), or a Blend of Both (our default, recommended option).

Once your Programs have been built, they will always be available to on your Account Dashboard. You can click on any Program from the list to go into the Edit view. Or, you can click the three dot menu option at the right and choose to Preview or Edit a Program. To learn more about Editing your Program anytime after you've completed Onboarding, read this support article.

Was this article helpful?
That’s Great!
Thank you for your feedback
Sorry! We couldn't be helpful
Thank you for your feedback
Feedback sent
We appreciate your effort and will try to fix the article