Every AutoNetTV subscription that uses a media player connected to a TV has a defined screen layout and a schedule of content associated to it. This is called a Program. You will have as many Programs as you have devices or subscriptions, and you will see and manage all of them in the Car Care Hub online platform.
You will see a list of your Program(s) on your Account Dashboard (the home screen). Each Program shown gives its name, the device (i.e. media player) with which it is associated, the date that device was originally activated (registered and connected to the AutoNetTV system), and its current internet connectivity status.
To Edit a Program, just click anywhere along the row of text for that Program (you'll notice it gets highlighted once your cursor hovers over it). You can also click the three dot menu option to the far right of any Program listed and choose to Preview Program, or Edit Program.

Once you click Edit Program, you'll now see the name, last edit date, layout, zones, and content assigned to that Program in a new screen. You'll also see a Media section on the right side of the screen.
For Car Care Entertainment TV (CCETV - waiting room / lobby TV) programs, you'll see more assets in Zone 1 - which is the main video zone.

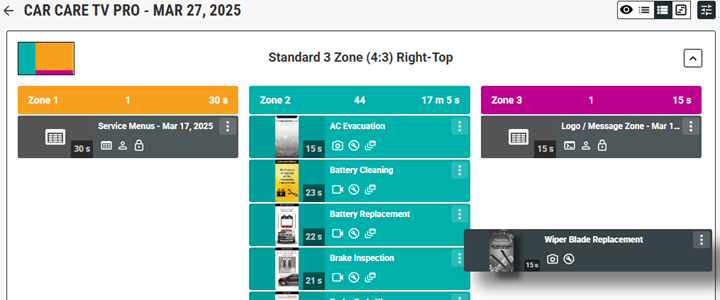
You'll find the following key information about your Program, as shown in the image below:
- A small rectangle showing the Layout you applied to this Program.
- At the top of each Zone you'll see it's number, the amount of files in that Zone, and the total length of time that those files will play in that Zone. Note that the length of every Program is determined by the Video Zone, which is Zone 1. Zones with shorter lengths will continue to loop.
- Each asset has a thumbnail showing a snippet of what that piece of content looks like. The thumbnail also displays the length of time for each asset on top of it. By default, all Images have a length of 15 seconds.
- Next to each asset you'll see its name and several small icons. These indicate several things, such as: File Type (video, image, template), Type (Entertainment, Car Care Education, or User uploaded), Source of file added to Program (System Auto Added, User Added, etc.). You can hover your cursor over each to see text with more information.
- You'll see that all assets shown match the color of the Zone in which they will display, except for the ones you add manually to the program - which are a gray color.

There is a three dot menu option on every asset. Click to see more options. This is how you can Remove any asset from the Program that you don't want to have displayed.

At the top right of the Program you'll see several icons. Hover your cursor over each icon to learn what it does. Here is a summary of their features:
- Preview Program - opens a preview window that shows your entire Program layout and zones playing together.
- Small & Large Asset Views - change the size of each asset block so you can see more/less in the window.
- Timeline View - sizes each asset based on its length, or runtime.
- Show/Hide the Media and other options at right.

On the right side of the screen is the Media and other Settings tray. To expand the details shown in the Media section at right, click the Filter icon (highlighted below in red) and you'll see many variables to help you sort and find the right file(s) to add to your Program.
In the below example, the drop down Service Category of Serpentine Belt has been selected. You can also type the word "serpentine" in the Search bar to see any/all assets that have the word serpentine in them, including belts and chains. You'll also see other Filters applied for Video as the File Type, AutoNetTV as the Content Source, the Aspect Ratio of 9 x 16 (which is a portrait or vertical layout used for the Zone 2 found on the side of the Program Layout), and videos with No Sound. This search returns 14 different videos that match those parameters. You can usually see, by the thumbnail, whether an asset is sized correctly (landscape vs portrait) for the Zone where you want to place the content. But using the Filter by Aspect Ratio helps to ensure you only get the exact results you want.

Once you've found the file you want, you can add it to your Program by clicking on it with your left mouse button, and holding the button down while moving your mouse to drag-and-drop it into the correct Zone of your Program on the left side of the screen. You'll notice the bar of the asset is gray until you align it with a specific Zone, at which point the bar will match the color of the Zone as a way to tell you it is aligned correctly.
Once you let go with your mouse button, the asset will now appear in the list with others, in the place where you inserted it. You can move the asset to a different spot for it to play. Any/all assets you manually add to your Program(s) will be colored gray.

Note - every Program has only one Zone that can play videos. This is Zone 1, and it's location will vary based on the Layout you've chosen. Each Zone has a different aspect ratio (which is the ratio of the width to the height of an image, video or screen). In this example, Zone 1, shown in orange, has a 16x9 aspect ratio (it is landscape or horizontal in orientation). So, if you try to add a file that has an aspect ratio different from the Zone, the system will give you a warning that it does not match. You can choose to continue and still add the file(s) to that Zone.

Once you're finished making changes to your Program, you must click the green Save button at the top right for your changes to apply.
Note that you can also Upload your own file(s) right within this Program Edit view (in addition to uploading from the Content menu).

For Car Care TV Pro (CCTV Pro) programs, you'll see only one asset in Zone 2 - which is the main menu template that displays the text of your services and pricing. Click the three dot menu to the right to open the available options, such as Play Asset to preview this zone. Please note that if you select Play Asset, the preview window will ONLY show that asset (in this case, the Menu). It will not show all Zones with the Layout you've previously chosen for this Program.
Select Edit Content to change the settings for your menu.

You'll now see the selections to Edit your Service Menu within this view. On the right side of the screen, scroll down to see the full Configure menu of options.
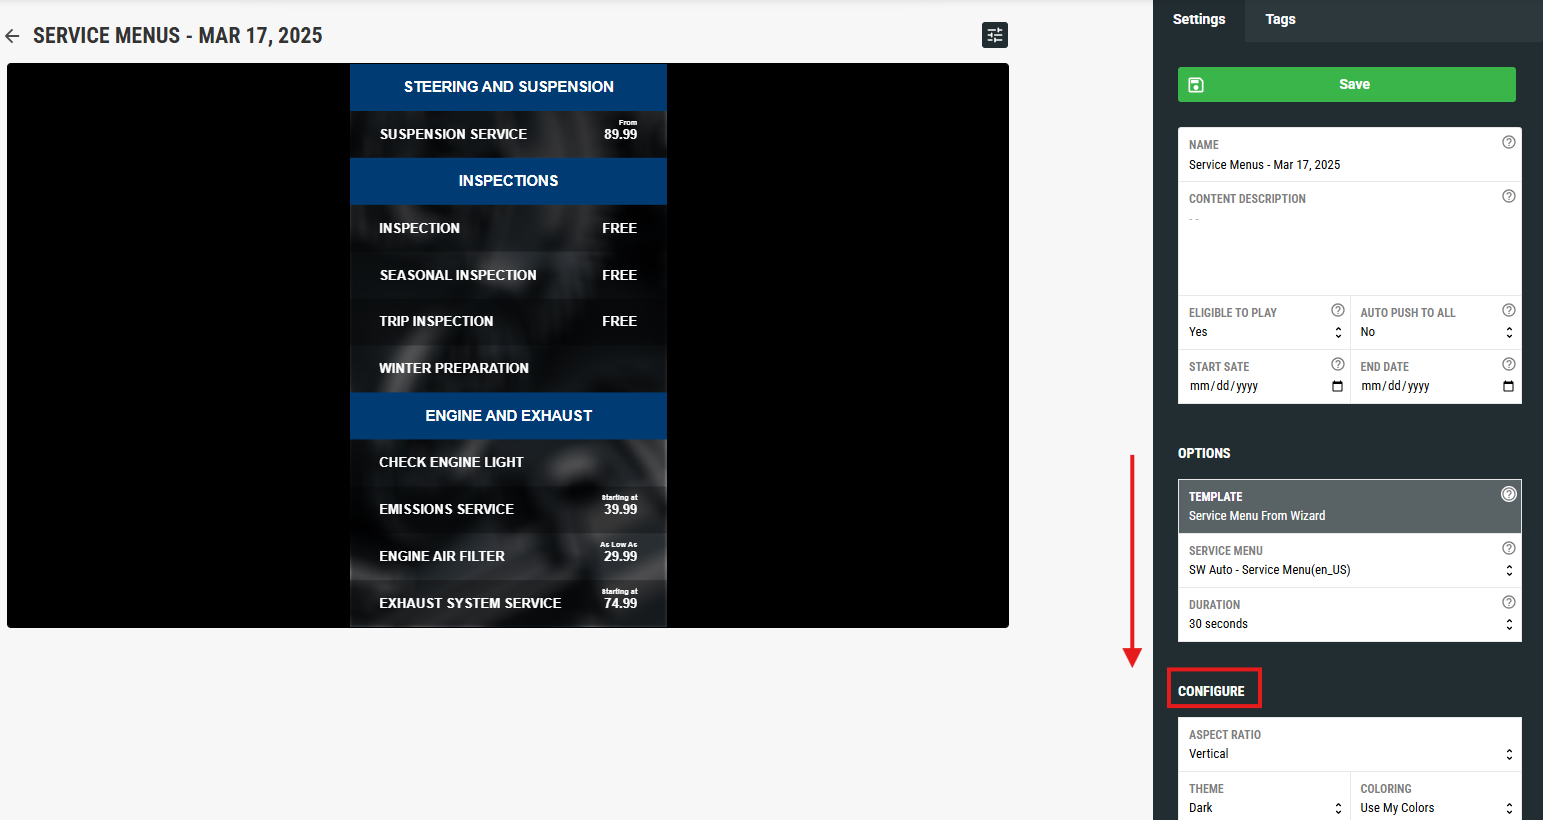
You'll see many of the same settings you selected as part of the Onboarding setup wizard.
But note that this Menu was built for a specific Zone aspect ratio and size, based on the Layout configuration you chose during Onboarding. So, the options you can change here are less than the ones you have available during Onboarding. So, in this example, 2 or 3 columns for the Menu may look poor on the screen in this smaller, 9x16 Zone based on the Layout.

In addition to changing your Menu settings, you can also follow these same steps to Edit the text in your Logo / Message zone. Back on the Program Edit view screen, click on the three dot menu next to your Logo / Message Zone asset found under Zone 3 and select Edit Content.
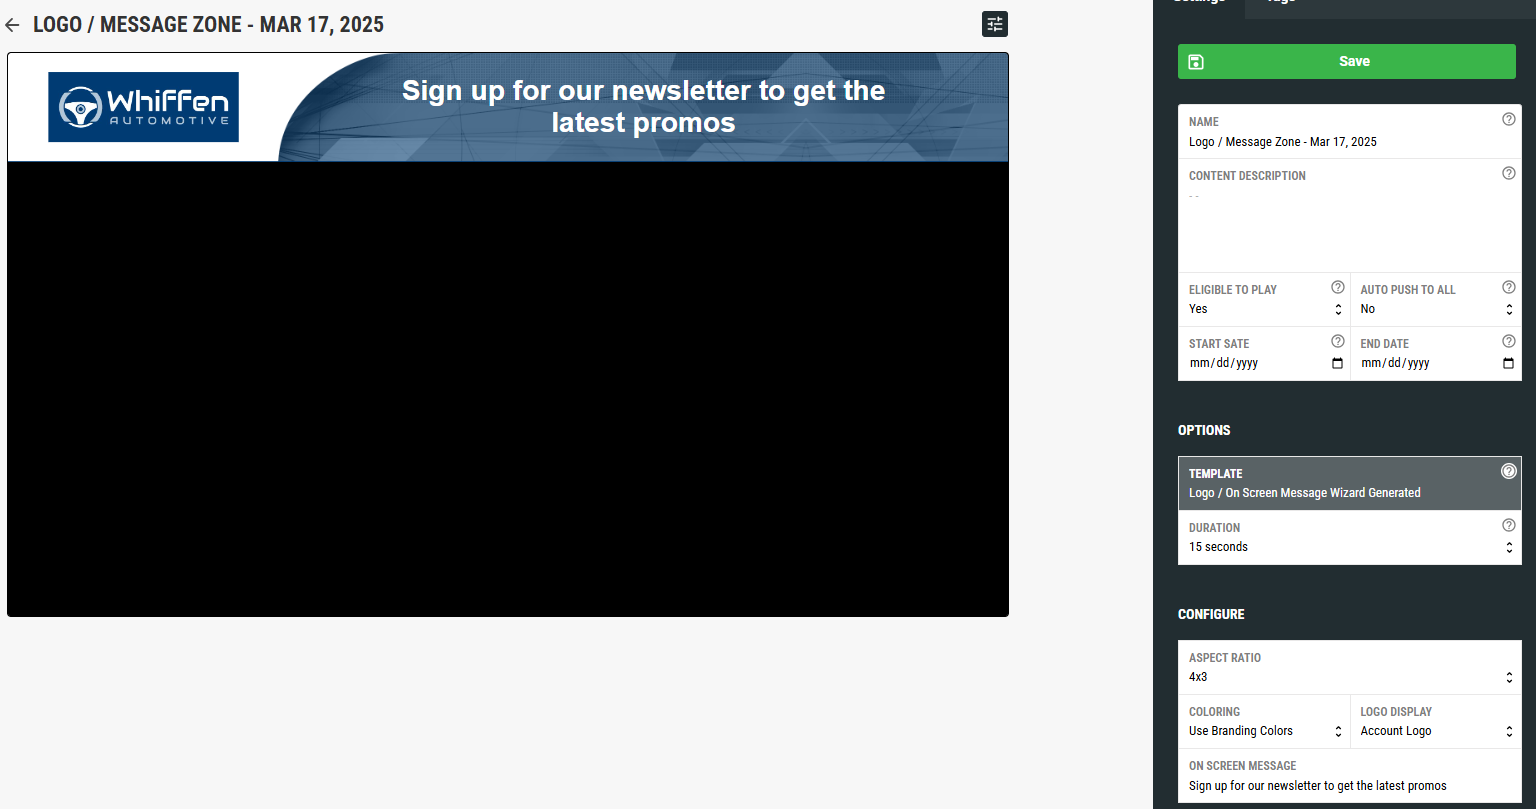
Then, in the menu at the right, under Configure, change the On Screen Message text and click Save.

If you haven't setup your Program, please complete the Onboarding Setup Wizard by clicking the link on the left side menu or on your Account Dashboard. To learn more about completing your Onboarding, read this support article.
Was this article helpful?
That’s Great!
Thank you for your feedback
Sorry! We couldn't be helpful
Thank you for your feedback
Feedback sent
We appreciate your effort and will try to fix the article