You can upload your own images and/or videos (which we'll call Files or Assets) in several places.
If you are on the Account Dashboard screen by clicking the large "Upload Video/Image" button. This will then follow the steps below.

Usually the quickest way to upload content is to click on the Content section from the left side menu, which is always available in the Car Care Hub platform.

You should now see a screen like this:
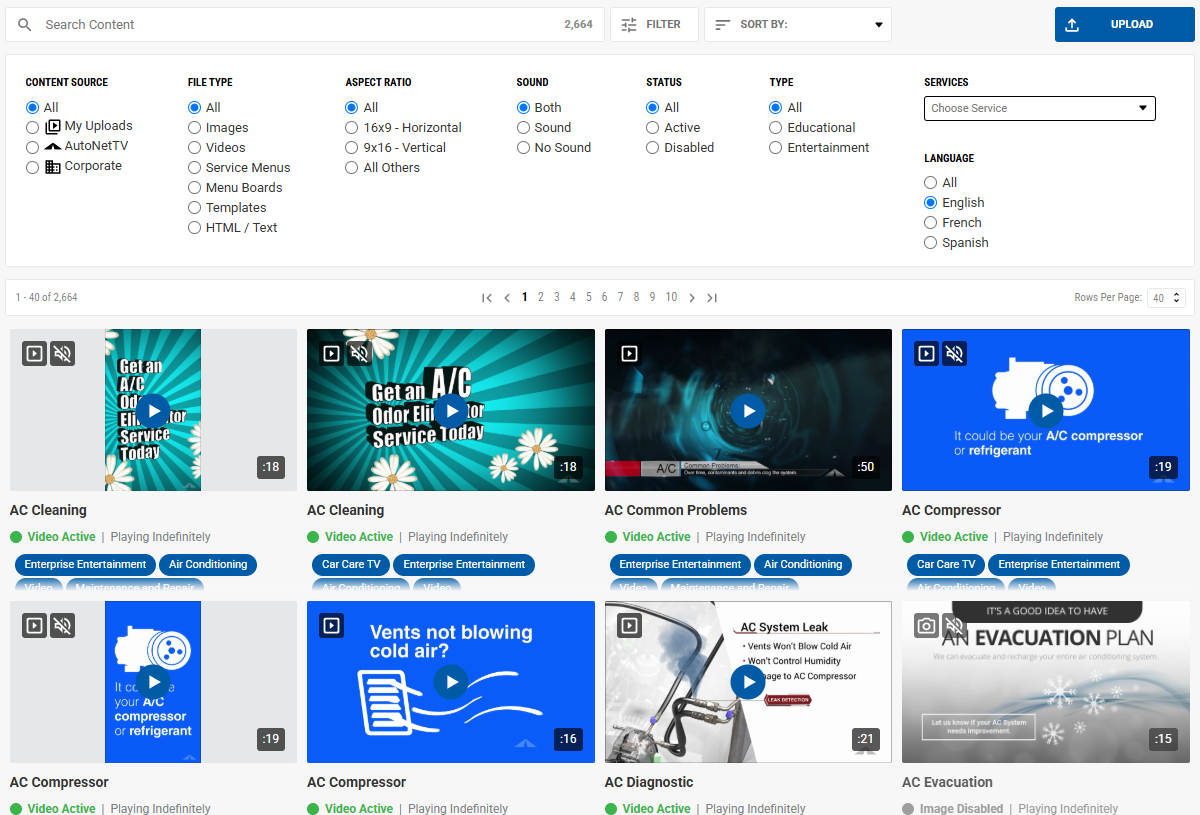
You'll notice that no Filters are applied, so content from every source is now viewable. The default view is to show all content (videos, images, etc.) from every source, and to sort it alphabetically. You can click the Filter option for Content Source at top left to show only content specific to your account.

At any time, click on the blue Upload button at the top right of the screen. This will open a dialogue window from your computer prompting you to find the file(s) from your computer. Select the files and click the Open button at the bottom of the file selection window.

Once the upload begins, you cannot click or navigate away from the page until your file(s) have all been uploaded.

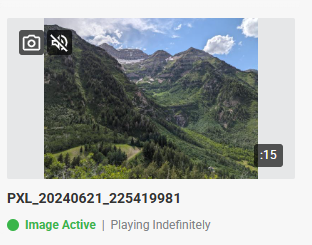
Once the files are done, you'll see the progress bars complete and a thumbnail for your new file(s) will appear, along with the name(s).
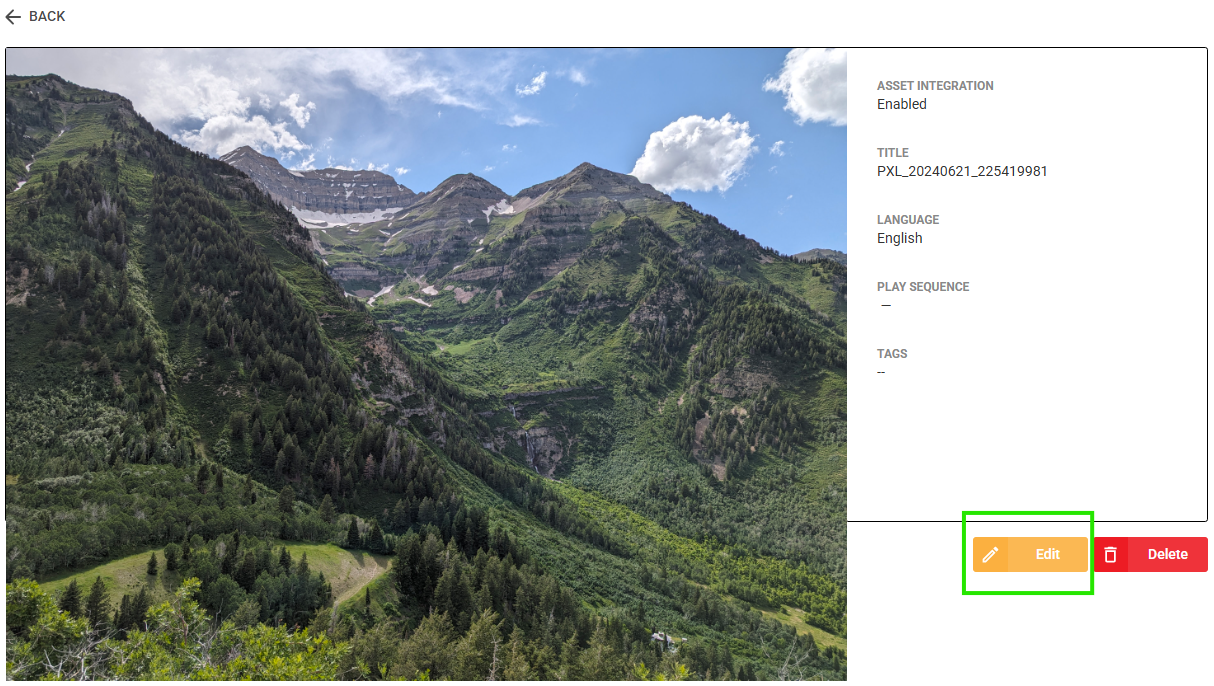
You can now click on your file(s) to Preview, and then click on Edit to change any properties.
The following properties are available for you to Edit on the file(s) you've uploaded:
- Name
- Description (in case this helps you to organize your file(s) more easily)
- Eligible to Play - This is set to Yes by default, but you can set this to No in order to prevent it from playing on any of your devices, but to keep the file in the system for when you are ready to use it.
- Auto Push To All - This option pushes the file to all of your subscription Programs and plays it once in the rotation.
- Start Date and End Date - this is helpful if you have a promo or special that is only valid for a specific date range. Enter the dates and your file(s) will only display on screen during those dates. If you specify a date range, and today is beyond those dates, you'll notice red text below the file thumbnail that says, "[File} Inactive", helping you to know that the file is no longer displaying on screen(s).
- Options (for Images only) - the default time for all images to display on screen is 15 seconds. But you can manually change this Duration on any individual file you upload here, which will change its display time permanently for anytime that file appears in a Program on screen.
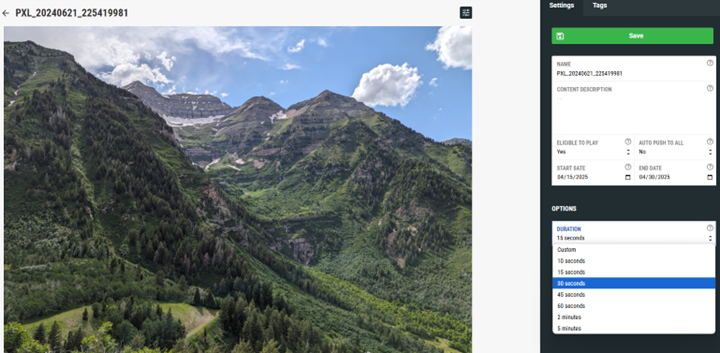
Click Save to apply the new settings to your file.
To learn more about how to find the right Content, read this support article.
Was this article helpful?
That’s Great!
Thank you for your feedback
Sorry! We couldn't be helpful
Thank you for your feedback
Feedback sent
We appreciate your effort and will try to fix the article